Monday, March 31, 2014

2 Sweet Layout Tutorial

I wanted to share a step by step Tutorial on how I created my 2 Sweet layout using March's Main Kit from My Creative Scrapbook.
First I started with this sheet of pattern paper that was in the kit and trimmed it to fit a 12 x 12 white cardstock. I wanted some white to peek out from all sides.

Then I cut another piece of pattern paper 9 x 7 3/4 inches as shown here..

After I used some store bough doilies. I used one doily and cut it in half and tucked it in as shown..
I wanted some banners to peek out as well so I  tucked that in as well.

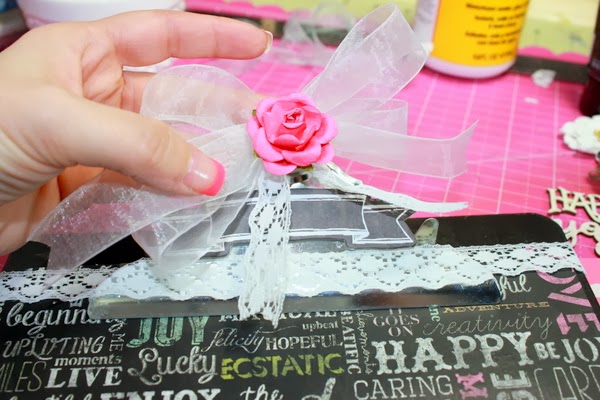
Then I used the chipboard that was in the kit to add to the right side of this layout. Just have fun tucking and layering all the cute chipboard pieces .
Be sure to add  what you feel you need to make it special..

Then I added a bow to the # 2.and the bird piece.I also added silver Liquid Pearls to the banners in the form of dots.

Below is my final result. I added my photo and a title up above that along with a sticker element on the left of the picture.

Hope you enjoyed following along...Be sure to check out March's kits from My Creative Scrapbook!!

Saturday, March 29, 2014

My Creative Scrapbook Sketch...

Don't forget about the sketch over at My Creative Sketches.
Below is March sketch...
This is what I did using the sketch...
You can win a awesome prize just by Linking your take on the sketch here..Good luck to everyone who enters.... :)

Sunday, March 9, 2014

March LE Kit Share-Prima!!!

This month we got to play with some new Prima!!! (Something Blue Collection!) Sunch a beautiful kit! I just loved playing with this kit! Here a picture and details of what you get in the kit..
Content:
  • Prima Something Blue colleciton papers 12x12 double sided
  • Love Melodies
    Just Married
    Enchanted Blooms
    Going to the chapel
    Announcement (2)
    Say Yes
    Reception
    Wedding Planner
  • Prima Something Blue 12x12 Chipboard sheet
  • Black ABC
  • MME tiny ABC sheet rose
  • Something blue brands
  • something blue stamp
  • Prima Lace sticker
  • Lyric Prima flower pkg of 9
  • Cherish Prima flower pkg of 24
  • Anna Marie Prima flowers pkg of 2
  • Cream ribbon
    green ribbon
FABULOUS KIT!!!

Here is what I did using this kit..


Trust me you will love this kit! Go check it out at My Creative Scrapbook!

March Main Kit Share... My Minds Eye!

This Month We got to play with My Minds Eye!!
Included in this Kit was 


Kit Contents: 
  • My Minds Eye
    12x12 doublesided papers
    Wild and free
    Pretty
    The best
    Blossoms
    Joy
    Spirited
    Party
    Play
    12x12 chipboard element sheet
  • ABC letter sheet brown
    Mini ABC sheet MME
  • Prima flowers cream with glitter (3)
    Prima new Lace sticker
  • Now and Then mixed pieces pkg 42 pieces
    Heidi swapp trim cream scallop trim package
  • Blue sheer ribbon
Like what you see Go to My Creative Scrapbook and get your kits now..


Better Late than Never Kit Share for February...

Here is some work I did in February.. I never got to post it as I had a huge makeover in my scraproom, and everything was boxed up.. But I still would like to share with you all the work I did on My Creative Scrapbook Kits.This first 4 layouts was done with the main kit...Loved playing with these..


The last 4 layouts was done using the LE Kit.. Sorry they not as bright. We had a horrible week of rainy weather.


Saturday, March 1, 2014

Altered Clipboard Using the New Prima Optimist!

This month I got to create with February's Off the Page Kit! Below is the steps I took to create my altered clipboard.. I got to use the new Prima Optimist!

 First I painted the edges of my clip board with black acrylic paint as shown here..

                                           
Next I cut down that paper that I wanted to use to cover the clipboard and used wet glue to adhere it down. Then I put a coat of modge podge to protect my paper.
Next I wet glued Lace across the clipboard and on the clip itself as shown here..Then I made a bow using the ribbon in the kit along with my drop off piece of lace. I then glued a rose in the center of that.
I knew I want this clipboard to be functional. So I added a sticky note pad to the bottom right corner. I wrapped ribbon around it and add another rose to the center. I then stamped the word at the bottom of my sticky pad using the stamp that was in the kit as well. About it is a piece of chipboard and a brad in the center as a embellishment.
Then on the left side at the bottom of the clip board I colored in two clothes pins that you can get just about anywheres and I glittered them up with stickles .This will hold the 2014 calendar.
Here is the calender. I printed it out from my computer cut them and matted them on cardstock with two different colors.Here is the site I got them from in case you want these as well.. Calender 
I used the leftover packaging to make a pocket for my extra month calenders and have that attached to the back of my board.

Next I want to add a family picture of my and my main man. I added a grouping of flowers and chipbaord pieces that was from the kit.I also Painted the wooden words in this kit as well. 
I also Tucked in a Pen under the ribbon of the sticky Notes for easy grabs..

Oh I must tell you this kit was very fun to play with. You can make your clipboard any way you like. Just have fun with it.


LinkWithin

Related Posts with Thumbnails